[Unreal TA] Universal Studio Villian-Con

(http://www NULL.terrymatthes NULL.com/wp-content/uploads/2023/10/VillainCon NULL.jpg)

What started over a year ago as offsite development has turned into onsite integration at Universal Studios Orlando. While onsite I worked out of Universal’s offices. It was a nice change of pace to be working with a client in their Studio. There’s a lot to be gained creatively from that kind of environmental shift. A lot of the work for me on this ride was iterating over the look of the lighting and assets with the creative director every couple of days. I would fine tune the look of each of the ride’s scenes with the lighter and then move onto some of the more technical art implementations. There is wall full of disco lights in one of the scenes and I’m particularly proud of the technical implementation of it. I was able to use some really fun texture tricks to give a good looking wall with a really low resource footprint. I might make a post about the technique as not a lot of people use UVs to the level they should be and that is a shame.

Through the course of working with other teams I found we were running into a lot of problems relating to texture requirements. Non square textures, non power of two textures, improperly tagged properties ect. I ended up writing a Python script to run over all textures on the project and provide a list of offending textures along with their violations. This script also set the texture’s max in game resolution. Being half in film and half in games we get a lot of resources that are way too high resolution for games so it’s a good practice of ours to always limit that in Unreal automatically.

Everyone on the project was exceedingly nice and tried their best to get along and respect each other’s schedules. It’s not easy when you have so many vendor’s working together. It can feel like someone is stepping on your toes when they’re really just trying to avoid creating an issue for someone else. The amount I learned while on this project was definitely the highlight. I got to work with some amazing people who are doing and have done amazing things. It was also pretty cool to have the creative execs from Illumination come down and give us feedback on our work. You don’t get an opportunity like that very often and I’m grateful for it.
(http://www NULL.terrymatthes NULL.com/wp-content/uploads/2023/10/20230422_202021 NULL.png)
[Unreal TA] Clash of Clans Ads


Recently our studio Squeeze (https://www NULL.squeezestudio NULL.com/) was tasked with creating some user acquisition ads for Super Cell’s Clash of Clans. I was responsible for the technical art systems in Unreal. This included wind and material systems as well as R&D for the ray traced Lumen rendering. It was a ton of fun and with any luck we’ll be at it again soon! They even let me drone on about some of the benefits of real time vs deferred rendering in the video above. There is a wind system I created that hooks into the grass, plants and trees. The FX artist was able to key the wind strength to align to his explosions giving the shots a more cohesive feel.

Later on I took the system I had developed for these ads and then improved upon it by implementing pivot painting on the grass. Pivot painting properly anchors the blade of each grass card to the ground. A lot of the time with material based wind effects you’ll get a general ‘waviness’ when wind is applied to an object, but it rarely looks correct. There was a little bit of cloth simulation being used here, but we kept it to a minimum as it can be very hard to art direct.

[Compositing TD] Kitty Katz


Kitty Katz was the first project I’ve worked on that uses Mercenaries Guerilla Render (http://guerillarender NULL.com/). This presented a unique learning opportunity I was excited to dive into. Being the TD for lighting and compositing at L’Atelier here in Montreal has been fun, but wearing two different hats really reduces the time I have to implement effective solutions. My work on the show consisted of creating Python scripts for both Nuke and Guerilla.

The Guerilla scripts were mostly for tracking input and output of different render layers with the occasional request for quality of like updates like scene graph bookmarks or the ability to create sub versions of scenes. In Nuke there were a lot of switches that the lighters wanted to turn on automatically based on what inputs were being utilized. This helped the junior side of the team out a lot and produced cleaner and less erroneous submissions for the CG supervisor to review.

If anyone is interested I would recommend using Guerilla Render, but know that there will be some time spent learning the software before your pumping out beautiful renders. I found functionally it’s very similar to Katana or Davinci and about as obtuse when it comes to how to get things done.


[Lighting TD] Scaredy Cats


Over at Western FX (https://www NULL.wfxstudios NULL.com/) we just finished up on a new show Scaredy Cats. I am super jazzed about this show. A lot of work went into creating the groom for Fink (the talking rat). I think he came out great! Here at Western I do a lot of actual art work, not just TD work. I’ve been preparing materials and adjusting UVs on assets. There is also a lot of substance painter work to be done as well. On the TD side of things not only was there groom work, but a lot of lighting fixes.

The shots needed geometry to catch shadows for the cats and rats as they ran around the different shots. This was really interesting and engaging to setup. There were more than a few scenes with a complex light source we had to fake the shadows for. Things like light rays coming through vents or windows. These types of shots all needed the geometry in place to cast the expected shadows on our furry friends.

The girls have a golden amulet that is one of the main set pieces in the show. The model is based off a real asset, but we were not given lidar or any kind of scan so it was modeled from reference. I really wish a lot of shows and studios would use lidar/scans for live action. These scans aren’t supposed to be cleaned up into the final geo and I think that’s where a lot of studios misunderstand the use of scans. These cans are there to act as a template so modelers can use them as a stub mesh or quick guide.  When you have an approximation of the physical asset modeling and lookdev go so much faster.

[Lighting TD] Super Pupz


Check out this awesome trailer for the episodic content I worked on at Western FX (https://www NULL.wfxstudios NULL.com/). I was responsible for lighting and surfacing for every episode across both shows. I worked in tandem with another lighting and surfacing artist to make sure all assets adhered to the standards setup during the look development stage of the project. Having spent so much time on purely CG projects this live action show was a breath of fresh air. There’s a special feeling you get when you integrate and asset perfectly into a live action shot. There were a lot of zany things the dogs did in this show and faking their super powers for the camera was a lot of fun.

Houdini was used heavily for this. In Houdini we worked with low poly models of the dogs and then used those for all sorts of effects. We had dogs running on water creating rooster tails, dogs running around hay fields making tornadoes, dogs going at super speeds and more. Western has an impressive pipeline for animating the dogs talking. This was not something I was part of but, it was really nice to see how it’s all setup. A lot of work went into making sure the assets materials were being rendered in the right colour space to give a realistic look. As is standard practice now a days the ACEScg standard was used throughout the show to ensure a cohesive look.

[R&D] V-Ray Brasserie

witteveen center


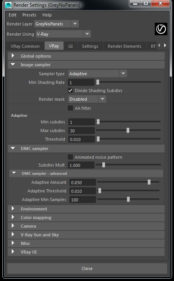
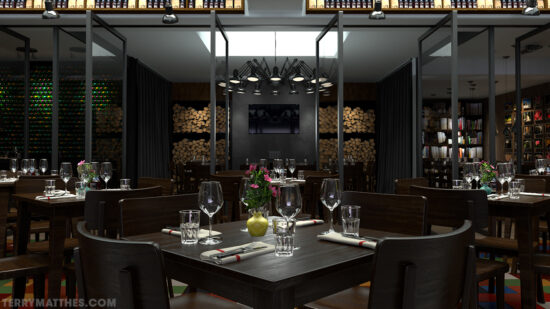
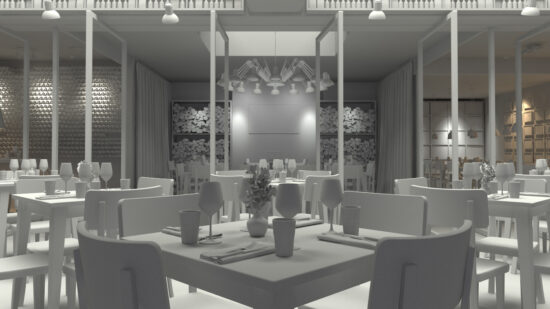
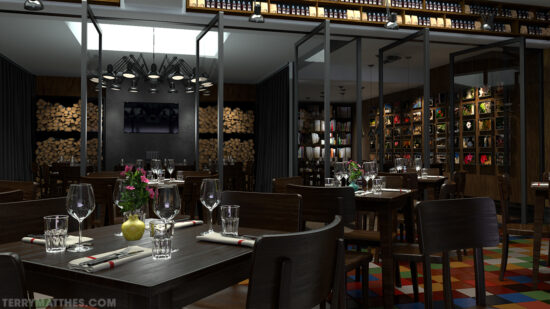
GISettings (http://www NULL.terrymatthes NULL.com/wp-content/uploads/2017/05/GISettings NULL.jpg)primarySettings (http://www NULL.terrymatthes NULL.com/wp-content/uploads/2017/05/primarySettings NULL.jpg)I took some time over the last few months to rework a scene I had modeled last year. I’ve redone all the lighting and materials in Vray as opposed to Mental Ray. A big part of this project was crushing render times down while retaining quality in the right places.  I’m in the process of rendering an animation of the environment. There is a lot of glass so if the settings aren’t balanced right between the aliasing and reflection/refraction quality the animation will “shimmer” where the glass in moving. The animation is 5 seconds at 30FPS or 150 frames. This means that even at the current render times of ~90 minutes a frame the animation would take 225 hours. I knew this would be a challenge, but what better way to practice using the diagnostic tools? The longer render times are actually acceptable given these are the minimum settings to avoid shimmering in the glass. If this needed to be done sooner I would ship this off to an online farm or ask some of my friends to render a portion of the frames for me.

I’ve baked out all of the GI so that I can start and stop the render when my PC has some spare time. If I didn’t bake out the GI I would get changes in the grain when starting and stopping the render sessions. I’ve chosen to go with Light cache as my primary bounce solver while Irradiance mapping will be solving all of the secondary bounces. In this post I’ve included 2 shots of my render settings. One for GI and the other for primary rays/Secondary (DMC rays). I tried to include all pertinent information in the shots. If you can’t see the setting it was left at default.

 witteveen center (http://www NULL.terrymatthes NULL.com/wp-content/uploads/2017/05/witteveenNB NULL.jpg)


Some of the materials were made in Substance Designer, while other’s were built right in Maya. One thing in the future I would like to experiment with is instancing. There is a lot of duplicate geometry between the logs and the wine bottles, the cutlery could be considered another culprit. The books and nic nacs on the back shelf are all HDRI shots of a bookshelf inside my living room. Next I created masks for each group of books. To keep things simple I created several 4K texture atlases for the bookshelf items and the pictures. I then merged all the picture geometry together. If I wanted to put a different picture in the frame I would simply move the UV cords of the corresponding faces over a new area of the atlas.


witteveenVrayGray (http://www NULL.terrymatthes NULL.com/wp-content/uploads/2017/05/witteveenVrayGray NULL.jpg)


The render settings in the attached images worked for me. I give them as a guide, but each project is specific and your settings will probably have to change to suit the exact needs of your scene. The primary rays are kept as low as can be. These are the heavy lifters we want talking care of edge cleanup (anti-aliasing). Pushing this too high will cleanup up your edges, but it will also force needlessly high samples on areas of your scene that don’t need it. Keep this as low as possible. The DMC (advanced) settings are way way higher. This is where you’re going to see a lot of difference in the clarity of the surfaces. Remember the primary rays are really only there to alias all your edges, not to cleanup your image. We want the secondary bounces to clarify the fine details in the materials. A great explanation of this technique can be found over at Akin Bilgic’s blog (http://www NULL.cggallery NULL.com/tutorials/vray_optimization/).

Before I begin the render I have to create all my material ID masks. I’ll take these into Nuke on my Mac mini with some stills and start the colour corrections in post. When the render is done I’ll apply the same node chain to the animation and then bake that all out as a MP4. I’ll post the animation and colour corrected stills when I finish them and link them to this post.

Good luck and if you have any questions don’t be afraid to reach out or comment in the post below. I’ll admit the comment section is a little ugly, but I haven’t had time to adjust the CSS styles on it since changing formats. One day… one day I’ll have time for everything :) Right? :(


witteveenNC (http://www NULL.terrymatthes NULL.com/wp-content/uploads/2017/05/witteveenNC NULL.jpg)

[Assistant TD] Suicide Squad


I Finished this project as an Assistant Technical Director for Framestore (https://www NULL.framestore NULL.com/) in 2021.
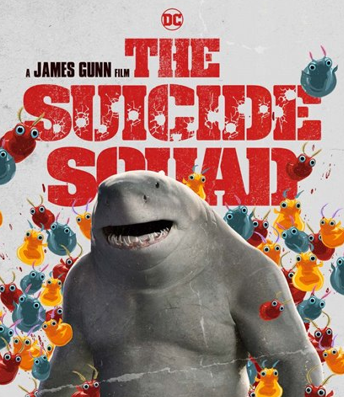
Most of the work I did on this project was assisting with ingestion of photogrammetry for the characters. I had not done photogrammetry ingestion before so I worked with a fellow ATD to accomplish this. There was a lot of back and forth between our studios before we came up with some settings that worked to get the same mesh across.

Our work was mostly on ‘The Weasel’ played by Sean Gunn, but also extended to King Shark played by Steve Agee. We used Maya for the majority of the work as that’s Framestore’s preferred DCC. During this project I learned a lot not only about ingesting photogrammetry, but also how to prepare and light assets for the process. Things I had never tried like using cross polarizing filters on the lights and camera lenses really made a huge difference. This enabled us to get rid of almost all specular highlights and really only pickup the albedo value of the subjects. I think I will give this a try at home as soon as I can pick up some polarizing filters for my Elinchrom lights.


[Assistant TD] Army of the Dead


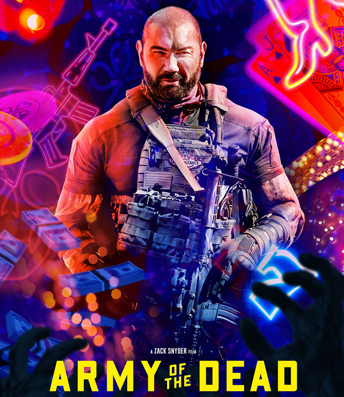
I helped with photogrammetry ingestion on this project. It took a lot of work to get the rigs and scans from the client lined up for this project as there were a lot of studios working on this at the same time. I Finished this project as an Assistant Technical Director for Framestore (https://www NULL.framestore NULL.com/) in 2021. As a studio we were gifted with a pretty fun asset to work on as well as a couple high flying (helicopter) shots of destroyed Las Vegas.

Our creature team took care of the zombie tiger, which was very cool to see. While groom worked on the tiger the ATD team worked on setting up cameras and ingesting all the models and textures that made of the destroyed strip of Vegas. There was a lot of crazy camera work on this show and by the end of it were quite happy with the results. There were a few resources (again Lidar) that would have been nice to haves, but we got it done despite this, so hurray!


[Assistant TD] Flora & Ulysses


This was the first show that was assigned to me solo. I Finished this project as the only Assistant Technical Director while at Framestore (https://www NULL.framestore NULL.com/) in 2021.
Having red the books to my daughter this was extra fun to work on. This show is over the top in the best ways! The most complex shot in the show was integrating a CG cat who jumps out of a pool to surprise one of the characters.  My work as an ATD came down to integrating everyone else’s work into the different shots. From cameras, to characters and animation there was a lot to do.

One of the more interesting tricks I picked up while on the show came out of a meeting with the CG supervisor. Something about the Squirrel’s groom just seemed off and then it was suggested we add little bits of random debris throughout the groom. This really helped it to not look so clean and gave it a living feel. I’ve used this trick several times since and it’s always one that makes CG sups sit up and take notice. It’s a small thing, but it goes a long way towards creating a believable character.